Introduction
Frequency Separation is a Photoshop technique to retouch the image. This will smooth the uneven skin color but still preserve the texture.
Top half of the Image is the original source. And The Bottom half is the result after use Frequency Separation technique to preserve the texture detail.
Here is the replication of the technique in After Effects and my explanation of how this works.
- Precomp the original image, call it ORG
- Apply Fast Blur effect
- Duplicate ORG to be "ORG - FqSep"
- Change mode to Linear Light
- Apply Invert and CC Composite effect
- Set CC Composite Opacity to 50%
- Create Adjustment Layer "FX : Blur" and put it between ORG and ORG - FqSep
- Apply Fast Blur filter to FX : Blur
- ORG and ORG - FqSep have to have the same amount of blur. The lower blurriness, the finer texture will be preserved.
- Adjustment layer "FX : BLUR" is used for smoothing the image.
- Use masks on FX : BLUR to smooth just only selected areas.
- Try to avoid blur along the hard edge, it'll create the sharpening effect.
Theory
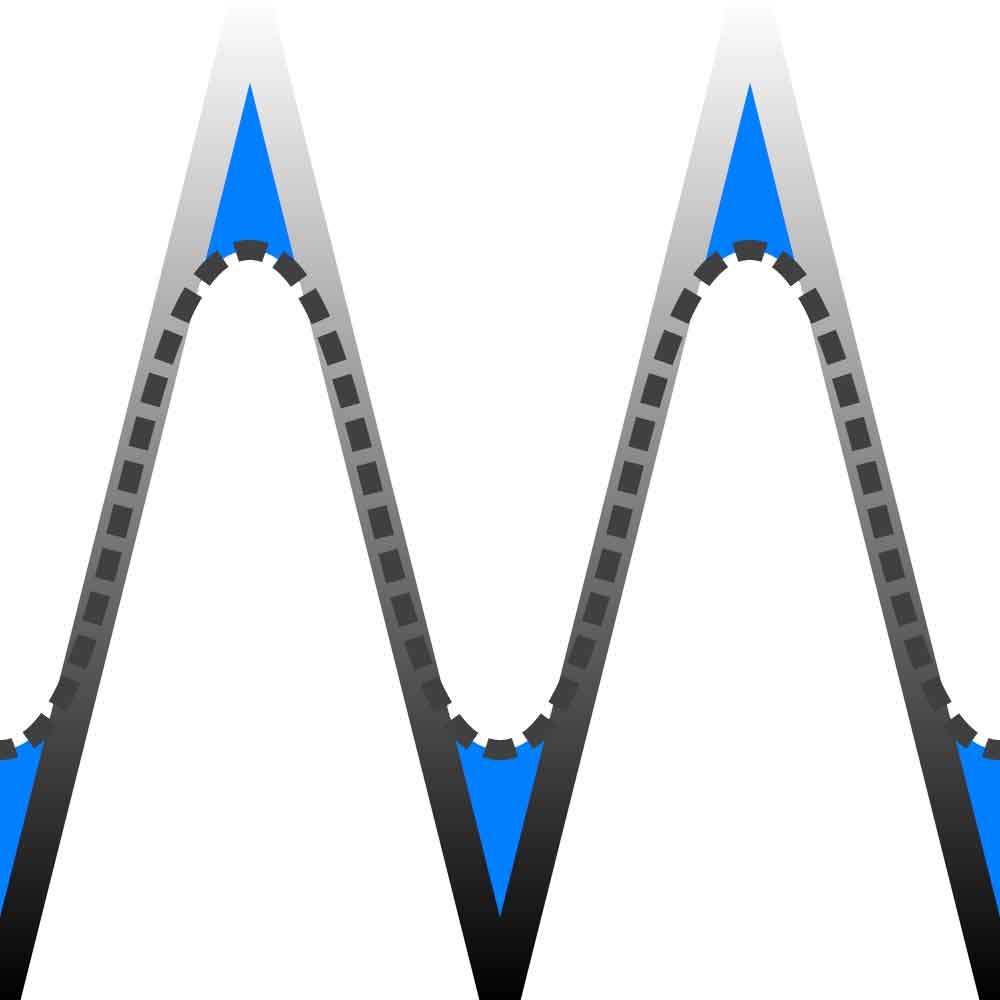
First, I have to say that I'm not sure why this's called Frequency Separation. From what I understand it seems to me more like it's separating the amplitudes. But who knows, I'm not computer science expert. Anyway, this is how it works in theory. The thickest triangle wave is represent the image date. Tips and Pits of the wave are the brightest and darkest points in the image. What Frequency Separation does is separating the Tips/Pits date (High Frequency), in blue area, and blurred data (Low Frequency), in dash line. So the Low Frequency date can be manipulated even further while the High Frequency date is saved separately into another layer.
Visualized this process step by step
Original Image
Apply blur to the original image
Apply Invert to Blurred Image
Hi-Fq Image
Blend 50% to Original Image. This is the how it create the Separated Frequency date.
This is how it happens when Hi-Fq date return Low-Fq date with Linear Light.


